WooCommerce SDS Connector allows you to transfer transport requests from your e-shop to the shipment delivery service SDS once or at regular intervals. If the e-shop customer chooses the SDS service in his order, the WooCommerce SDS Connector plugin sends all necessary data about the shipment to the SDS (consignee and its address, shipment weight and dimensions, cash on delivery price) and you no longer have to fill in manually shipping order for SDS. Shipping labels can be printed directly from the e-shop.
Sync range provided by WooCommerce SDS Connector
- Transfer of shipment requests from WooCommerce to SDS.
- Transfer of shipments from SDS to WooCommerce.
To deploy the WooCommerce SDS Connector:
1. With the shipment delivery service SDS, enter into a contract for securing the transport of your shipments. You will receive access data (login and password) to the SDS WebPortal.
2. Buy and download the WooCommerce GO4 Connector plugin from our e-shop wooconn.sk.
3. Install the purchased plugin in your WooCommerce e-shop (Plugins > Add new > Upload plugin) and activate it after installation.
4. You can find the plugin settings here: WooCommerce > Settings > SDS Connector tab.
5. Fill in all required fields:
- Purchase code – you will receive it after purchasing the plugin
- SDS login, password and identifier
- Shipment pickup address
- Specification of sending transport requests to SDS (Shipping methods, order statuses) and next settings
6. Schedule a time interval for sending shipping requests to SDS – either at regular intervals or once a day. Example of sync scheduler settings: If you want all new shipping orders to be sent to SDS every day at 10:00 am, select “Once a day” from “Sync scheduler” and enter in “Sync time” 10:00.
7. Transport requests to SDS can also be sent manually directly from the list of orders or from the order details in the e-shop. When sending manually, it is possible to specify the number and types of required packages.
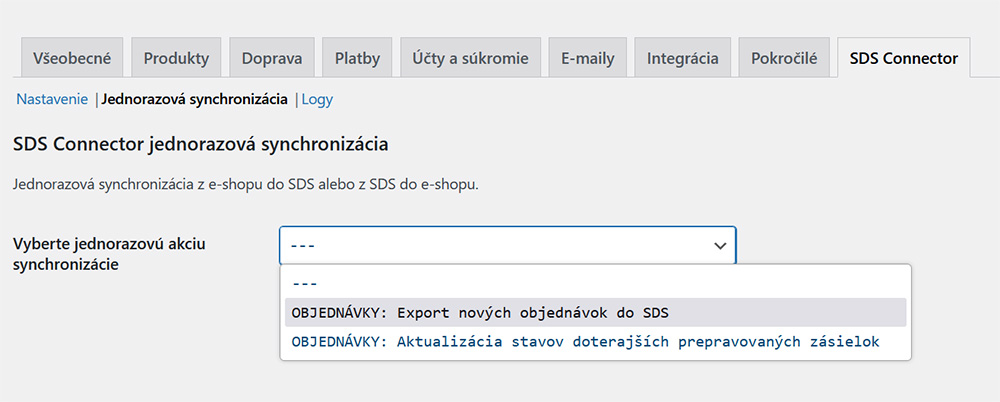
One-time synchronization and logs
Part of the functionality of the plugin is also the manual execution of one-time synchronization, ie. in case you need to immediately send requests for the transport of all new orders from the e-shop, you will choose this option from the offer and have it executed.
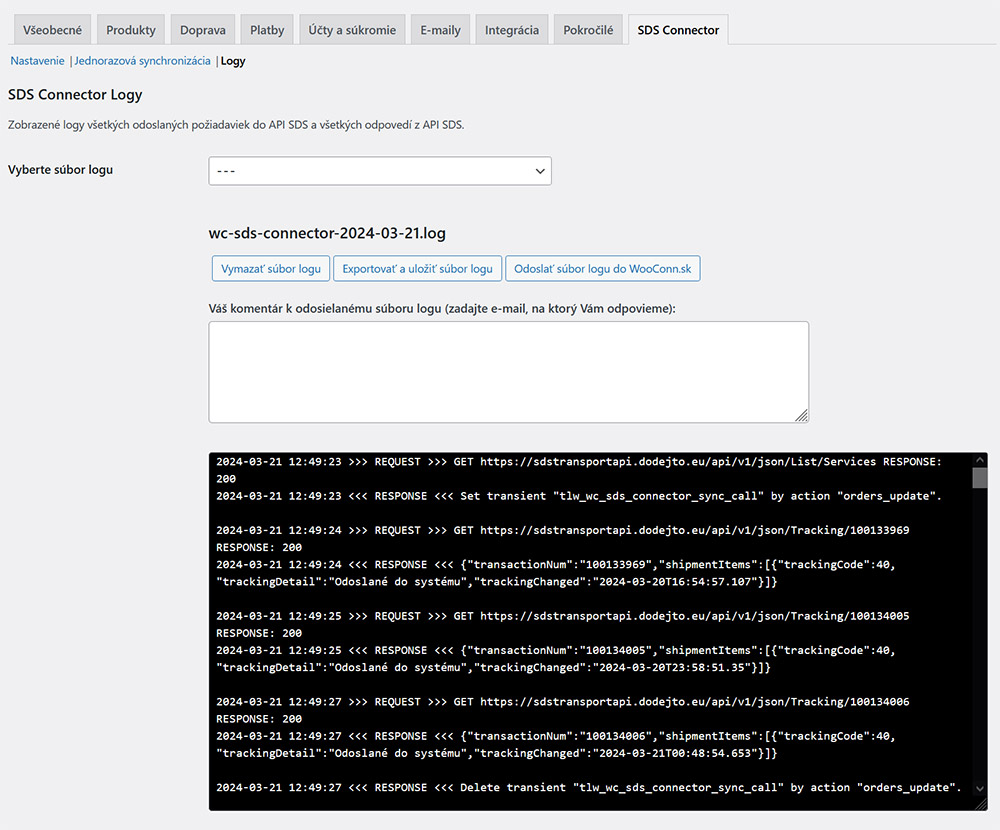
Synchronization logs between the e-shop and the SDS API are displayed within the plugin interface.

Compatibility
WordPress: 5.2+
WooCommerce: 4.2+
PHP: 7.2+
How to set up a cron job
For the WooCommerce SDS Connector to work properly, it is necessary to set a “cron job” at intervals of every 5 minutes. For more information on cron job setup options, see FAQ.